A good primer is not simply an extra coat. The best choice depends on the surface, the problem you are trying to solve, and the finish coat that will follow. For most clean interior walls, a quality water-based primer is the practical default; cabinets and glossy trim often benefit from a bonding primer, while stubborn stains or tannin bleed may call for a stronger stain-blocking formula.
TL;DR: Choose primer by surface condition, not by marketing label. Water-based primer suits most drywall and routine wall work. Bonding primer is a better fit for slick cabinets and previously coated trim. Alkyd or shellac-based stain blockers are useful when smoke, water marks, knots, or tannins could bleed through. Prep still matters more than buying the most expensive can.
Match the primer to the job first
Primer has several possible jobs: helping a topcoat adhere, evening out porosity, sealing repaired areas, reducing stain bleed, and creating a more uniform base. A single product may do more than one of these things, but no primer is ideal for every surface.
For older homes, surface preparation can be a safety issue rather than a cosmetic one. The EPA’s lead-safe renovation guidance explains why sanding, scraping, drilling, and other work that disturbs pre-1978 paint can create hazardous dust. If lead may be present, do not treat aggressive sanding as routine prep.
The main primer types and where they fit
| Primer type | Best fit | Main strength | Main trade-off |
|---|---|---|---|
| Water-based acrylic/latex | Drywall, patched walls, many painted surfaces | Easy cleanup, low odor, flexible everyday use | May not block the toughest stains or tannins |
| Bonding primer | Glossy paint, laminate, cabinets, slick trim | Strong adhesion on hard-to-coat surfaces | Surface still needs to be clean and sound |
| Alkyd/oil-based stain blocker | Bare wood, tannin-prone trim, smoke or water stains | Strong sealing and stain resistance | More odor and solvent cleanup; longer drying can apply |
| Shellac-based stain blocker | Severe odors, knots, difficult stains | Fast, aggressive stain and odor sealing | Strong fumes and specialized cleanup; not needed for routine walls |
| Drywall/PVA primer | New bare drywall and joint compound | Evens porous surfaces economically | Too specialized for glossy or stain-heavy surfaces |
This table is a use-case guide, not a universal ranking. The substrate and topcoat instructions on the actual product label should control the final choice.
Best primer approach for interior walls
For newly installed drywall or broad areas of fresh joint compound, a drywall-specific primer is usually economical and effective because it reduces uneven absorption between paper face and compound. On previously painted walls that are clean, dull, and in good condition, a general-purpose water-based primer may be enough, and in some repaint situations a separate primer may not be necessary at all.
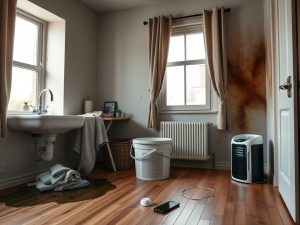
Prime repaired areas when patches have different porosity from the surrounding wall. Also consider a dedicated stain-blocking primer where there are isolated marks that could migrate through a finish coat. Water damage is different from a simple discoloration: fix and dry the moisture source before coating it. If the wall was affected by a recent incident, review the practical cleanup steps in what to do after a minor water leak or small fire incident before you think about repainting.
Cabinets need adhesion more than blanket coverage
Kitchen and bathroom cabinets are touched, wiped, bumped, and exposed to residues more often than ordinary walls. That makes adhesion and surface cleaning especially important. Degrease thoroughly, rinse or wipe as directed by the cleaner manufacturer, repair damage, and scuff the surface when the coating system requires it.
For slick factory finishes, laminate, and previously coated cabinetry, a bonding primer is often the safest category to investigate. Sherwin-Williams’ cabinet preparation guidance similarly emphasizes cleaning, repair, and the use of bonding or stain-blocking primer for cabinet projects. That is a manufacturer recommendation, not a rule for every brand, so confirm compatibility with your chosen topcoat.
Bare or stained wood can create another issue: tannins and old stain may discolor a light finish. An alkyd or other stain-blocking primer is often chosen for this reason. Apply a small test area first, especially when the existing finish is unknown.
Trim and doors: choose for substrate and wear
Baseboards, casings, doors, and window trim can be bare wood, painted wood, MDF, finger-jointed stock, metal, or previously varnished material. A water-based multi-surface primer works well for many sound painted surfaces and MDF. Bare knots, resinous wood, or old staining may need a stain blocker. Very glossy trim often needs a bonding-oriented product plus careful cleaning.
The goal is not to build a thick primer layer. It is to create a sound, uniform interface between the existing surface and the finish coat. Excessively heavy primer can create its own sanding and texture problems.
If the project includes a garage wall or trim refresh before electrical work, finish dusty paint work before equipment installation where practical. Our overview of EV charger basics for home garages explains why charger placement and electrical assessment should be planned separately from cosmetic upgrades.
What matters more than price
A budget primer can be entirely adequate on new drywall or a low-risk wall repaint if it matches the substrate and finish system. Spending more is more defensible when the project has a specific failure risk, such as slick laminate, heavy staining, tannin-rich wood, or a high-visibility finish where extra sanding and recoating would be costly.
A useful shortlist by use case looks like this:
- Budget wall prep: drywall/PVA or basic water-based primer for new drywall and broad patching.
- Everyday multipurpose: acrylic water-based primer for mixed interior wall and trim work where surfaces are sound.
- Cabinet priority: dedicated bonding primer for slick, previously coated, or laminate surfaces.
- Stain priority: alkyd or specialized stain-blocking primer for smoke marks, water stains after the cause is fixed, and tannin-prone wood.
- Severe odor or knot sealing: shellac-based primer when the product label specifically supports the problem and ventilation can be managed safely.
Do not assume a premium price automatically means better performance for your project. Compatibility, prep, and correct film application matter more.
A simple decision sequence before you buy
1. Identify the substrate: drywall, wood, laminate, metal, MDF, or existing coating.
2. Fix moisture, grease, loose coating, and structural surface defects first.
3. Decide whether the main need is porosity control, adhesion, or stain blocking.
4. Check the primer label for the exact substrate and indoor use.
5. Confirm compatibility with the intended finish coat.
6. Test a small area when the existing coating or stain history is uncertain.
7. Follow drying, ventilation, and cleanup instructions instead of guessing.
Choose the system that solves the actual surface problem
For a typical room, start simple: clean surface, appropriate prep, water-based primer where needed, and a compatible finish coat. Move to bonding or stronger stain-blocking products only when the surface condition justifies them. That approach usually saves more time than treating every wall, cabinet, and piece of trim as the same job.
Home improvement information is provided for general educational purposes only. Paint preparation can involve lead, solvents, dust, electrical components, or damaged building materials. Follow product labels and local requirements, and use qualified professionals when hazards or uncertain conditions are present.
For your next project, identify the substrate and failure risk before shopping, then compare primer labels against those needs rather than choosing by price or a broad “paint and primer” claim.