Moving houseplants outdoors in warm weather and bringing them back inside in fall can improve growth and give plants a seasonal reset, but abrupt changes in light, temperature, wind, humidity, and pest pressure can damage foliage. The safest approach is gradual acclimation in both directions, combined with careful pest inspection and a change in watering habits.
TL;DR: Move plants gradually. In spring, wait until temperatures are reliably suitable for the species, start in full shade or bright shelter, then increase light over one to two weeks. In fall, bring tropical houseplants in before cold nights, inspect and clean them, isolate them from other plants, and expect lower light to reduce water and fertilizer needs.
Why seasonal moves stress plants
Indoor and outdoor environments differ more than they appear. Outdoor shade can be brighter than a sunny indoor window. Wind increases water loss. Rain changes the moisture pattern in containers. Night temperatures fluctuate more outdoors, while indoor heating can sharply reduce humidity.
A plant that has grown leaves adapted to indoor light can sunburn when placed directly in strong outdoor sun. The reverse move can cause yellowing or leaf drop as the plant adjusts to lower light. These reactions are often stress responses, not proof that the plant is dying.
Iowa State University Extension’s guide to moving indoor plants outside specifically recommends gradual acclimation and warns against moving houseplants directly from indoors into full sun.
Before moving plants outdoors in spring
Start with species requirements. Tropical foliage plants, cacti, succulents, orchids, and flowering houseplants do not all tolerate the same light or night temperature. Check a reliable plant-specific source if you are unsure.
Prepare a staging area that is bright but protected from direct midday sun and strong wind. A covered porch, shaded patio, or location under high tree canopy can work. Clean saucers, inspect drainage holes, and make sure pots are stable enough for outdoor gusts.
If the plant needs repotting, consider doing it before the move so you are not changing container, root environment, light, and temperature all at once. Avoid stacking multiple stresses in the same day unless the plant has an urgent problem.
Spring transition: a practical step-by-step method
1. Wait for suitable nights. Use the plant’s cold tolerance, not the calendar alone. Many tropical houseplants are damaged by chilly temperatures well above freezing.
2. Start in shade. Place indoor plants in a sheltered, fully shaded outdoor spot for a few hours, then return them indoors if nights are still cool.
3. Increase outdoor time gradually. Extend the duration over several days as weather remains stable.
4. Add light slowly. Move sun-tolerant plants toward brighter conditions in stages. Plants that prefer shade may remain in bright shade all summer.
5. Watch leaves. Pale or bleached patches can indicate sun injury; wilting can indicate heat, wind, dry soil, or root stress.
6. Adjust watering. Outdoor containers can dry faster, but rain can also keep them unexpectedly wet. Check the soil rather than following an indoor schedule.
For succulents, gradual light adjustment is especially important. Our beginner FAQ on indoor succulent care covers why low-light-grown succulents can scorch when exposed to intense sun too quickly.
When to start bringing plants back inside
Do not wait for the first frost. Many common houseplants are tropical and can be damaged by nights in the 40s F, although exact tolerance varies. Iowa State Extension advises bringing many houseplants in when nighttime temperatures begin consistently reaching around 50 F, and the University of Minnesota similarly notes that cooler fall temperatures can damage tropical houseplants.
The University of Minnesota Extension’s fall guidance emphasizes pest inspection, cleaning, and gradual reintroduction to the indoor environment.
Watch the forecast and the plant, not a fixed date. A warm autumn can extend the outdoor season, while an early cold snap may require a faster move.
Fall transition: inspect before the plant crosses the door
Examine leaf undersides, stem joints, new growth, pot rims, drainage holes, and the soil surface. Look for sticky residue, webbing, cottony clusters, bumps, chewed leaves, ants, or flying insects. Rinse foliage where appropriate and clean the outside of the pot.
If you detect pests, identify them before treating. Do not automatically spray every plant with a pesticide. Product choice, concentration, plant sensitivity, indoor-use labeling, and local regulations matter. Physical removal, water sprays, pruning, or insecticidal soap may be appropriate for some pests, but follow the product label and extension guidance.
Keep returned plants apart from established indoor plants for a period of observation when space allows. Iowa State recommends isolation for several weeks because some pests become obvious only after the plant has been indoors for a while.
Water and fertilizer needs usually decline indoors
Lower light means slower photosynthesis and often slower growth. As a result, the pot may stay wet longer after watering. Check the soil before watering and allow the plant’s root-zone needs to guide frequency.
Many houseplants need less fertilizer during low-light winter periods. Continuing a summer feeding schedule can create salt buildup or weak growth. Resume more active feeding when light and growth increase, unless the species has a different seasonal pattern.
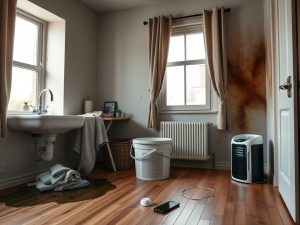
If the indoor area has experienced a plumbing leak or persistent dampness, solve that building moisture problem before using it as a plant zone. Plants should not be used to mask wet drywall, mold, or damaged flooring. Our guide to minor water-leak response explains why drying the structure promptly matters.
Troubleshooting the most common transition problems
- Bleached or tan patches outdoors: likely sunscald after too much light too quickly. Move to shade and acclimate more slowly.
- Sudden wilting outside: check soil moisture, root condition, heat, and wind exposure before assuming the plant needs more water.
- Leaf drop after coming inside: often an adjustment to lower light or changed temperature; keep care consistent.
- Tiny pests appear indoors: isolate the plant and identify the pest before treatment.
- Soil stays wet for many days: reduce watering frequency, improve drainage, and provide appropriate light and airflow.
- Long, weak growth in winter: increase suitable light rather than adding more fertilizer.
Tools and prep that make the process easier
Useful basics include a watering can or hose with gentle spray, clean pruning snips, gloves, trays or saucers, a soft cloth, a hand lens for pest inspection, and a stable cart or dolly for heavy containers. For large plants, recruit help rather than lifting awkward pots alone.
Label plants with special cold or light needs if you manage a large collection. A simple seasonal note on your phone can record when a plant moved, where it was placed, and whether it reacted well. That makes next year’s transition easier.
Treat the move as acclimation, not relocation
The key is to change one environment into the other gradually. Give the plant time to build leaves and water-use patterns suited to its new conditions, inspect for problems before they spread, and adjust care after the move instead of carrying the old routine forward unchanged.
Gardening information is for general educational purposes. Plant tolerances, pesticide rules, and local climate conditions vary by species and region. Follow plant-specific guidance and product labels, and consult local extension professionals when pest, disease, or toxicity questions are uncertain.
For the next seasonal move, choose a shaded staging area in advance and begin the transition before temperature or weather forces a same-day change.